Before proceeding, ensure that you have disconnected your router if you have one. Your computer should be connected directly to the jack in the wall using an Ethernet cable.
Select your operating system below:
Microsoft Windows
Windows 8
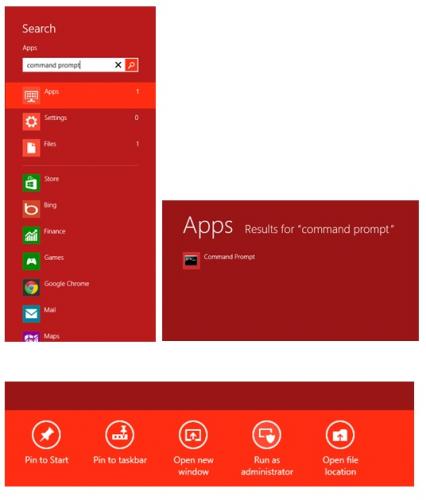
Open the Windows Start Screen by either moving your mouse to the bottom left corner of the screen and tapping or clicking, or by pressing the windows key. Then type “cmd” or "Command Prompt". Right click, and select “Run as Administrator”. The Command Prompt will open, and the instructions are the same as other versions of Windows from this point.
All versions except Windows 8
-
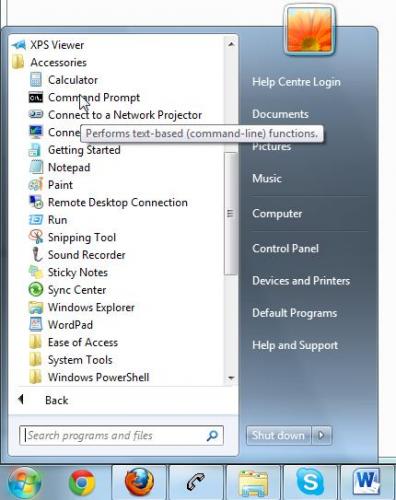
Open the Start Menu, then All Programs, then Accessories, and finally Command Prompt. In Windows 7 and Vista, right click Command Prompt and select 'Run As Administrator'.
-
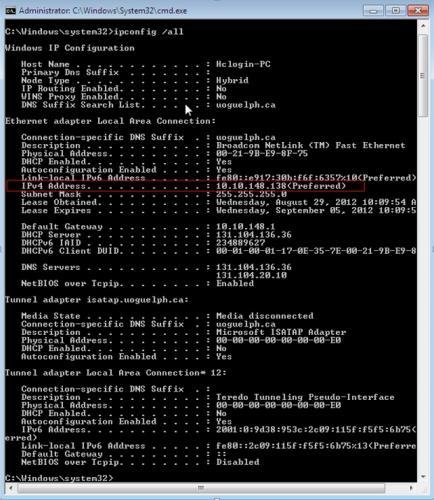
In Command Prompt, type "ipconfig /all", and press enter.
-
Your IPv4 Address should be displayed under "Ethernet Adapter Local Area Connection" . Proceed to the page which corresponds to your IP address (x and y are variable digits):
192.168.x.y [1]
169.254.x.y [2]
10.10.x.y [3]
Apple Macintosh OSX
-
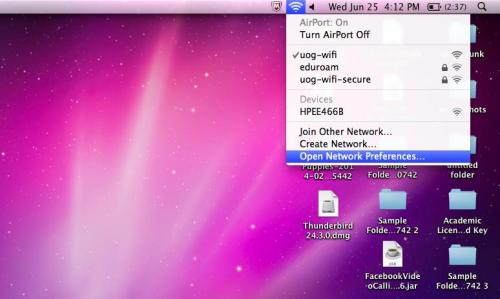
Open your Network Preferences through the network icon.
-
With 'Ethernet' selected on the left hand side, you should be able to see your IP Address and Router address in the centre.
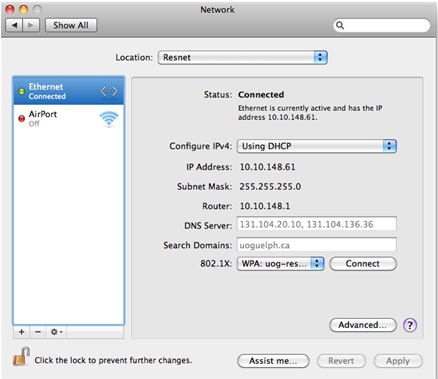
Proceed to the page which corresponds to your IP address (x and y are variable digits):
192.168.x.y [1]
169.254.x.y [2]
10.10.x.y [3]
If you have any questions about these instructions or any step is not working, feel free to contact the CCS Help Centre at extension 58888 or by email at IThelp@uoguelph.ca [4]. You can also visit our IT Help Desk on the first floor of the Library.