VPN AnyConnect Installation Guide for Mac
Max OS X Version
These installation instructions are for non-Managed Desktop Mac users without the VPN client software installed (Managed Desktop clients should have the VPN client software installed. If not, contact the CCS Help Centre).
The University of Guelph provides a Virtual Private Network (VPN) service to staff and faculty to facilitate remote (i.e., off-campus) access to select on-campus resources. VPN is a requirement for accessing U of G systems or applications where there may be a security risk or privacy concern with the data or systems involved. Examples of these systems include the U of G Central File Service (CFS) and the FRS system. VPN creates a secure and encrypted connection over the internet, providing authentication, confidentiality and data integrity for users working from an off-campus location. The VPN client used by U of G is the Cisco AnyConnect Secure Mobility Client (referred to as “AnyConnect” in this document).
Note: It is not recommended to run more than one VPN client on your device at a time. If you are using a computer that has another VPN client already installed, ensure that it is not running at the same time as AnyConnect.
VPN Installation Instructions
You must have the required administrative privileges to install software on your University-provided computer. If you do not have administrative rights, please contact your system administrator or contact the CCS Help Centre at 58888help@uoguelph.ca [1] or 519-824-4120 x58888.
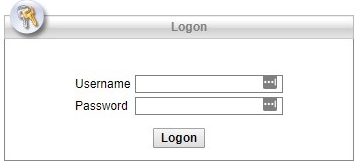
- Download the AnyConnect Client installation file. If you are on campus when downloading it, you must go to https://vpn2.uoguelph.ca [2]. If you are off campus when downloading the file, go to https://vpn.uoguelph.ca [3].
- Login using your Central Login ID and password.
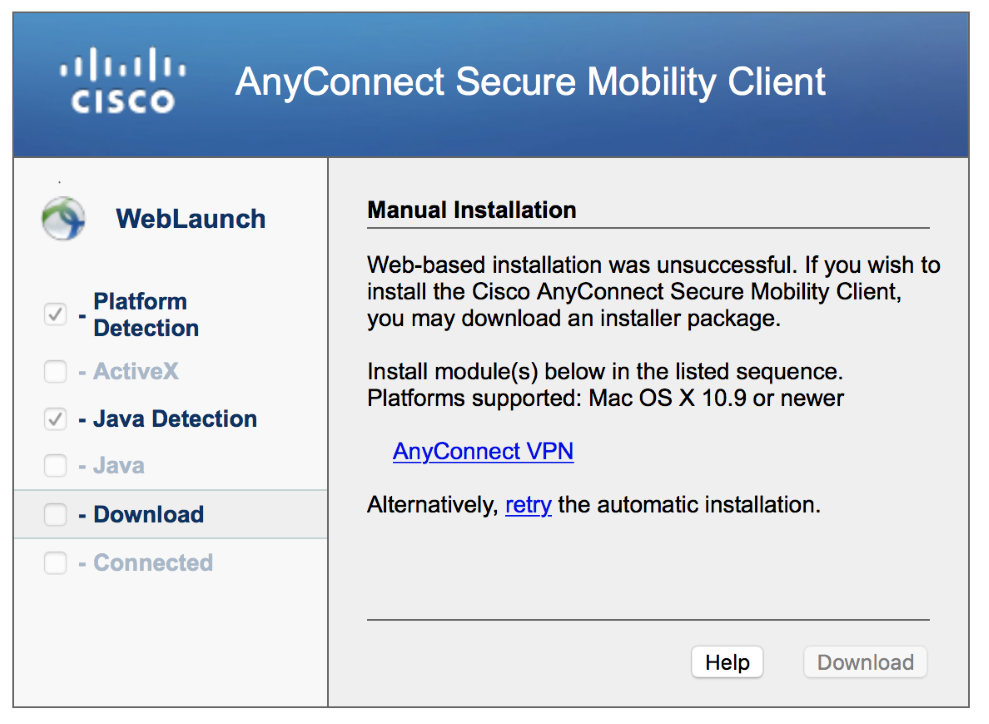
Please note that the automatic Java-based installation will fail. This is expected due to newer Java versions on computers and does NOT indicate a problem. Once the Java installation fails, you will see the screen below. - Click the "Mac OS X 10.8+ (Intel)" link to save the file on your Mac computer.
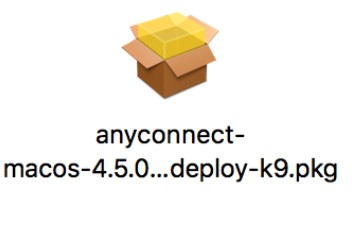
- Locate the file in your "Downloads" folder (or wherever your downloads are saved).
- Open the .dmg file (e.g. anyconnect-macosx-3.1.14018-web-deploy- k9.dmg – please note the version number may change)
- Run the vpn.pkg file
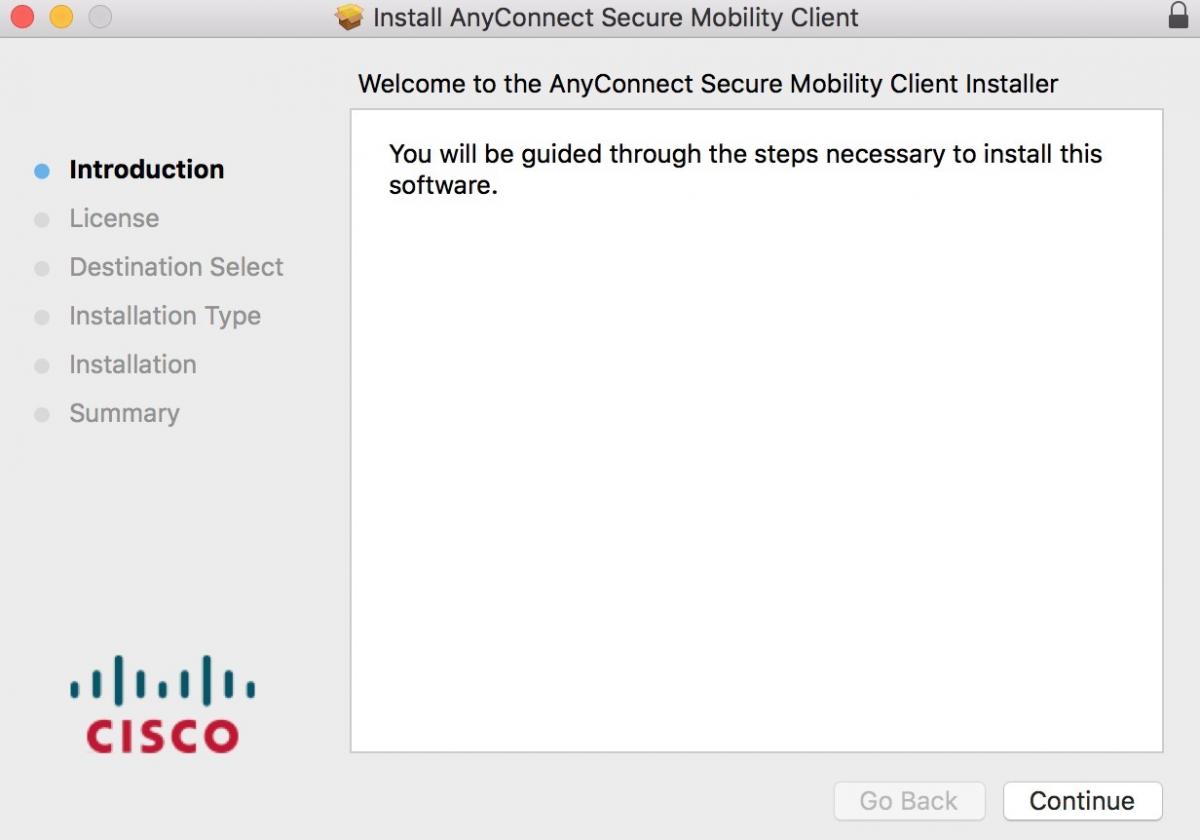
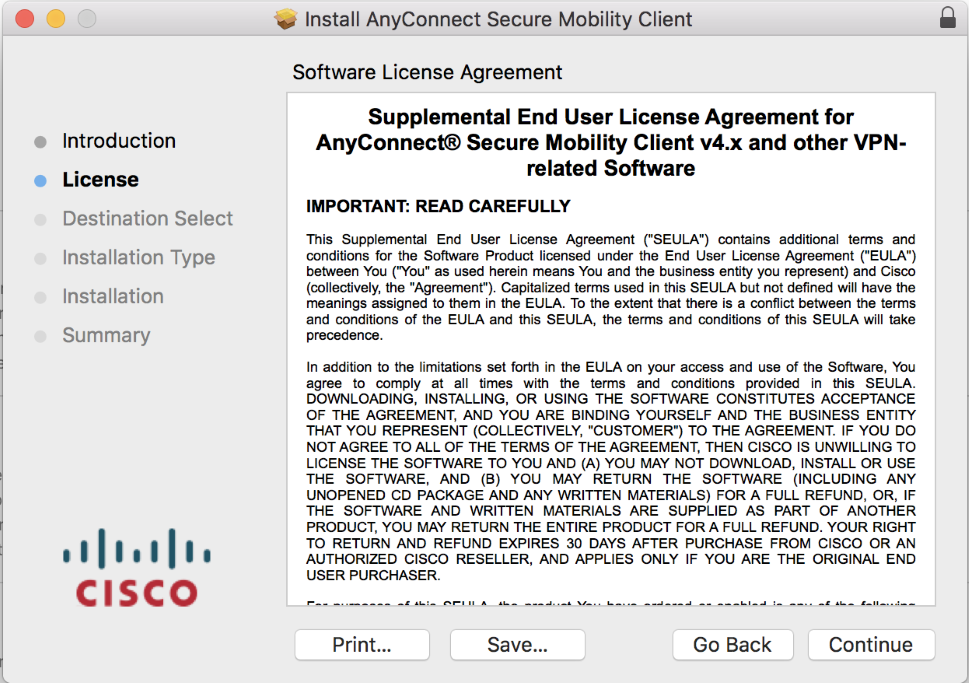
- You will then see the Install AnyConnect Secure Mobility Client screen below. Click "Continue".
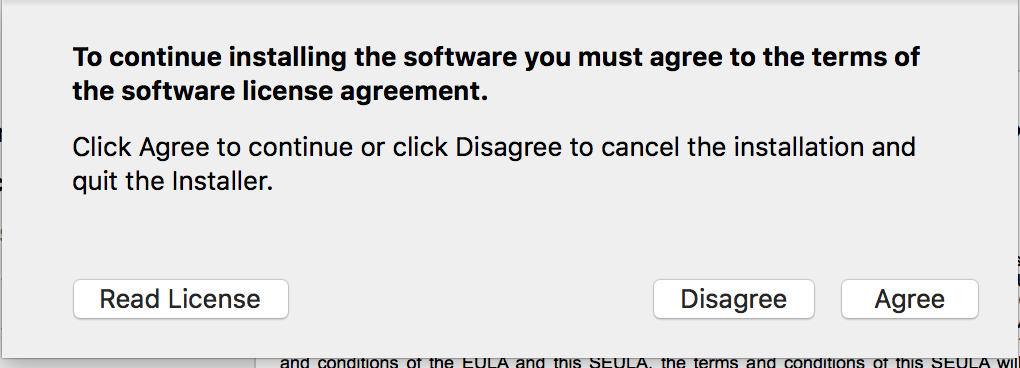
- Read the End-User License Agreement and click "Continue" and then "Agree".
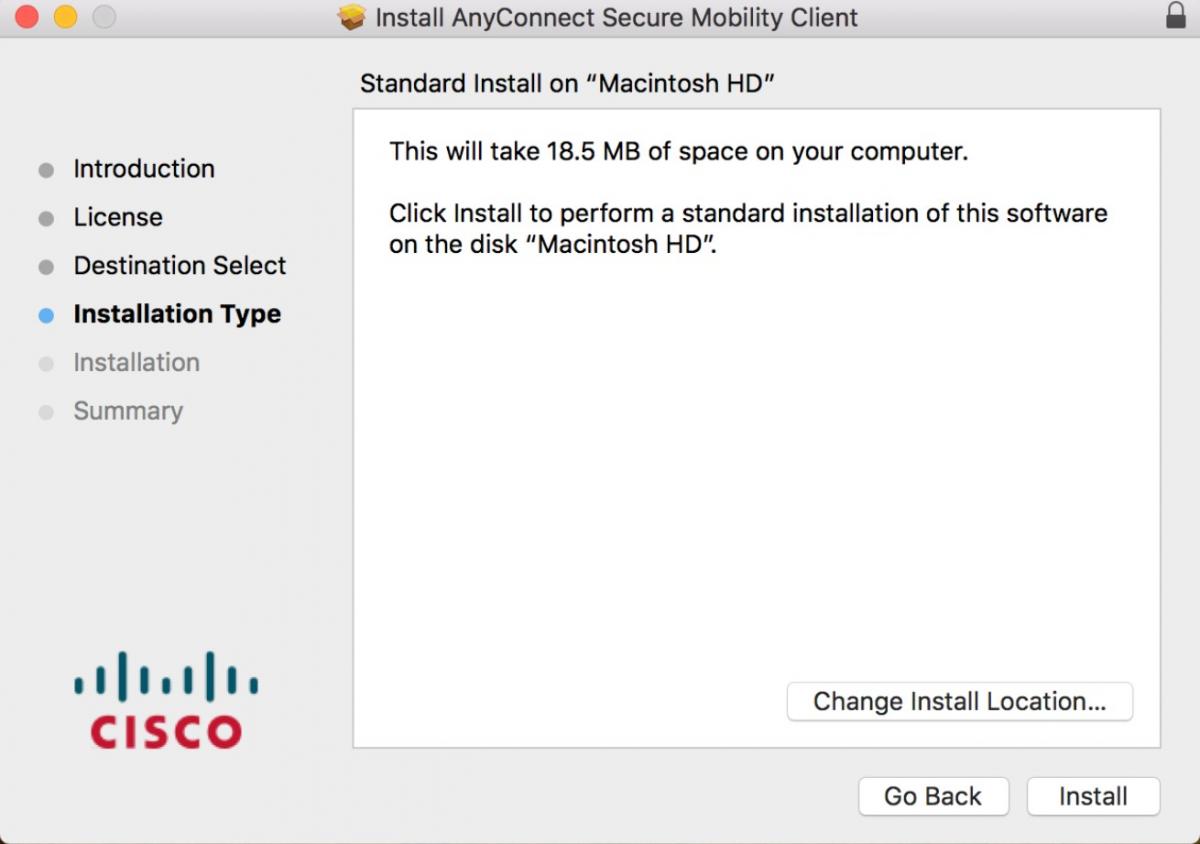
- Click "Install".
Note: You may be prompted to authorize the install. In this case, you will need to use your Mac administrator username and password (most commonly the login credentials you use to sign in to your computer/laptop). You must have the required administrative privileges to install software on your University-provided computer. If you do not have administrative rights, please contact your system administrator or contact the CCS Help Centre at 58888help@uoguelph.ca [1] or 519-824-4120 x58888.
- Once the install has finished, click "Close".
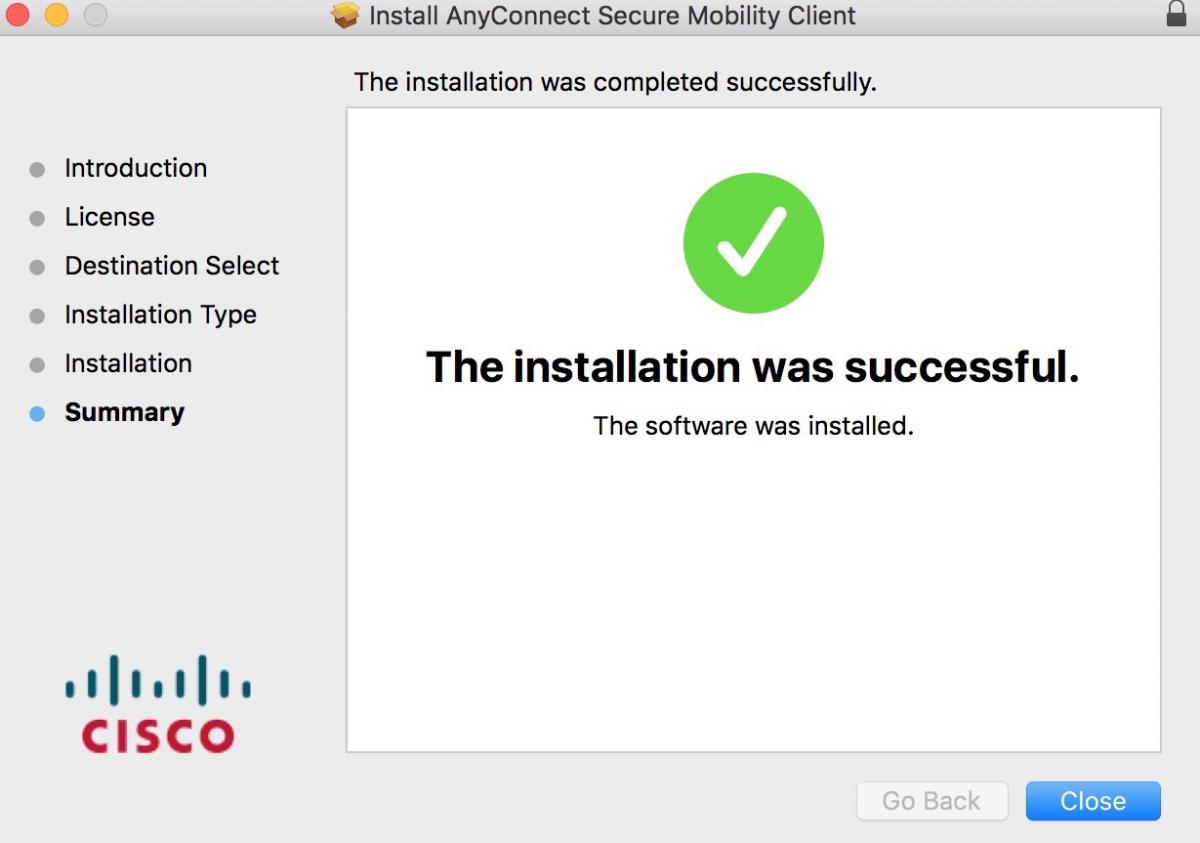
The installation of VPN is now complete.