We recommend trying to connect through JoinNow before doing the manual configuration: JoinNow Mac OSX [1]
Is uog-wifi-secure not working? Follow these Special Instructions for MAC [2].
Follow the step-by-step tutorial to connect to uog-wifi-secure for Mac OSX 10.5 & 10.6.
Configuring WPA
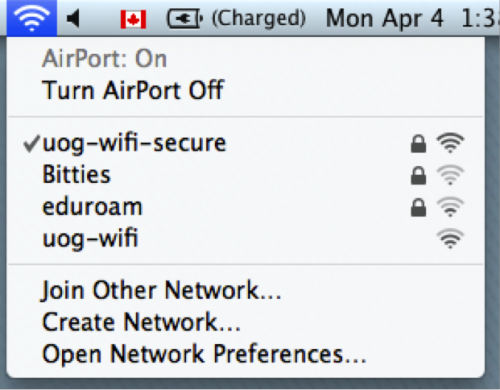
- Click on the AirPort icon from the toolbar and select “uog-wifi-secure” or “eduroam”.
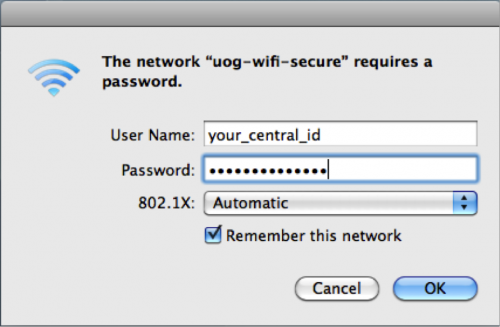
- Enter your Central UserID and password in The network “uog-wifi-secure” (or ”eduroam” ) requires a password window.
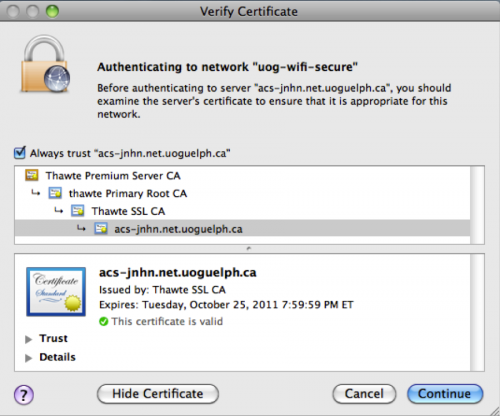
- In the Verify Clarification window, click on Show Certificate.
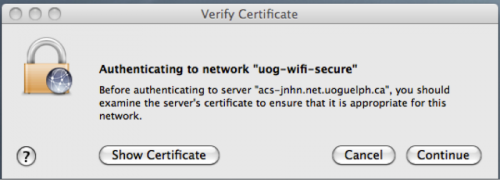
- The Verify Certificate window expands. Make sure the certificate is valid and issued to acs-annu.net.uoguelph.ca. Click on the arrow next to Trust.
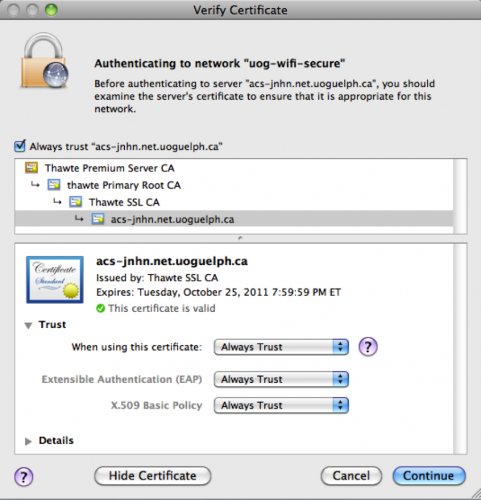
- Under Trust, When using this certificate, click on the arrow next to Use System Defaults and select Always Trust. This will also automatically reset the Extensible Authentication (EAP) and X.509 Basic Policy options to Always Trust. Click on Continue.
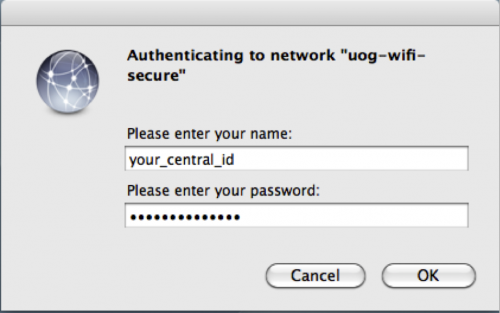
- In the Authenticating to network “uog-wifi-secure” window, enter your Central Login ID and password.
- For “uog-wifi-secure”, Launch your browser and access any internet sites such as www.google.com [3]. You should see the following message when NAC is recognizing your computer: You are being redirected to the network authentication page. You are now connecting to the campus secure wireless.
Note: Each time you restart your computer you maybe prompted for your user name and password when re-connecting to the campus secure wireless.
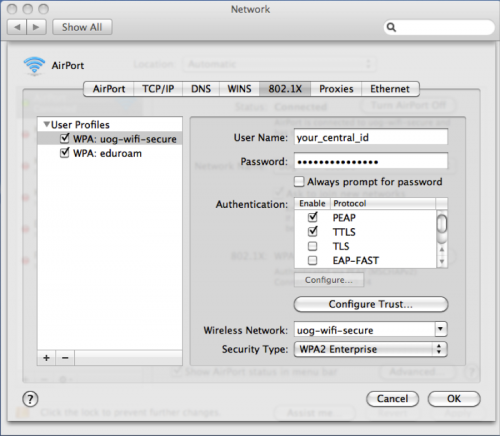
Change Network Preference for AirPort and 802.1x (Optional)
- Go to System Preferences / Network / AirPort / Advanced.
- You can drag “uog-wifi-secure” and/or “eduroam” onto the top of the Preferred Networks, above uog-wifi and others.

- After your initial configuration, a WPA: uog-wifi-secure User Profile should be automatically created under 802.1x. You can type your Central ID and password, and leave Always prompt for password unselected to avoid future prompts.
- Make sure at least PEAP and TTLS are selected under Authentication. Also make sure the TTLS Inner Authentication is MSCHAP2 when clicking on TTLS and then Configure.