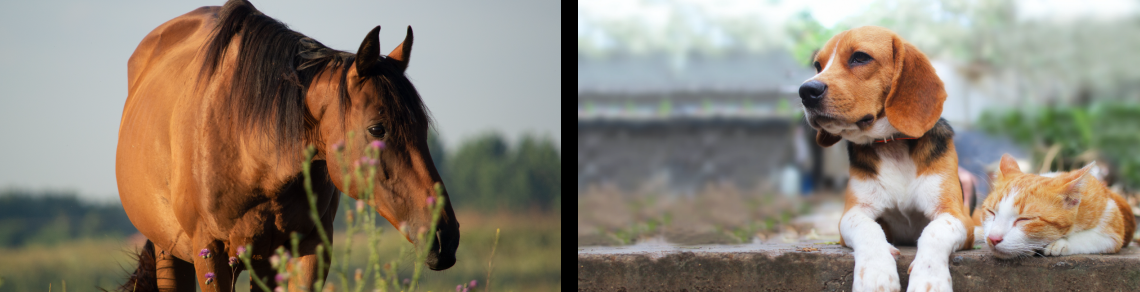

Rabies sample collection for veterinarians
The following information is intended for use by veterinary personnel (veterinarians and technicians) who may be required to collect samples from deceased animals for rabies testing as part of their professional duties. Other individuals should not attempt these procedures.
For more information about rabies and rabies sample collection and submission related to domestic animal exposure in Ontario, please contact the OMAFRA Agriculture Information Contact Centre (AICC) at 877-424-1300.
Personal Protective equipment (PPE)
Where to perform sample collection
Bats (and other animals <500 g)
Brain removal technique
Cleaning equipment and environment after sampling
Shipping samples cold vs frozen
Personal protective equipment (PPE)
- PPE required for collecting rabies samples varies depending on the sample being collected.
- A pair of disposable gloves should be worn in all cases when handling specimens.
- Exposure to rabies virus via the eyes is considered the highest risk due to the close proximity to the brain, therefore eye protection (goggles/facemask) is strongly recommended for head or brain removal.
- Cut-resistant gloves, designated coveralls, steel-toe footwear, and disposable or scrubbable overboots are also recommended for brain removal.
- Individuals collecting specimens for rabies testing should have a current rabies titre (in the last two years) of at least 0.5 IU/mL by the rapid fluorescent-focus inhibition test.
- Any Category 2 or 3 exposure to the animal’s saliva or neural tissue during sample collection should be reported to your Public Health Unit as soon as possible, in order to assess whether post-exposure prophylaxis (PEP) is required prior to obtaining rabies test results for the sample.
Where to perform sample collection
- Sampling (i.e. removal of heads or brains) should be performed in a secluded area, away from other animals and people.
- Nearby surfaces (e.g. table, floor) should be easy to disinfect, or sampling should take place in an area that can be blocked off from other animals.
- Rabies virus is very liable and is highly susceptible to routine disinfectants, desiccation, UV light, heat etc., although like most viruses it can be preserved by extreme cold.
- Place newspaper or other disposable absorbent material underneath the animal’s head to protect surfaces from damage by tools and to help absorb any liquids that are released.
- For small animals, it may be possible to perform the procedure with the carcass partly in or on a body bag, which can then be used for disposal.
- If using a hatchet, sampling should always be done on the floor.
Bats (and other animals <500 g)
- No “sampling” is required in these cases because the entire bat is sent to the rabies lab to help facilitate species identification.
- Remove any maggots or visible insect eggs from the carcass prior to packaging, as maggots can completely destroy the animal’s brain by the time the sample reaches the lab.
- Most importantly, ensure the bat is dead prior to packaging. Bats have been shipped unintentionally live to the rabies lab for testing, which is both inhumane and a risk to lab personnel.
- Bats have survived for days in closed containers, even at refrigeration temperatures, and occasionally even after freezing (NOTE: placing a live bat in a freezer is considered inhumane, even though in the past it was a recommended means of “euthanasia” for use by members of the public).
- When removing a bat from any bag or container, always do so in an enclosed room and wearing gloves.
- If you discover the bat is still alive, it must be humanely euthanized prior to shipping.
- Place the bat in the corner of a clear plastic bag to safely restrain it.
- Euthanasia can be achieved by administering 0.5 mL of euthanol IP directly through the bag. If euthanol is not available or cannot be used for another reason, there are other techniques that can be used. Please contact OMAFRA via the AICC at 1-877-424-1300 for details. Alternatively, a local wildlife control company may be willing to assist.
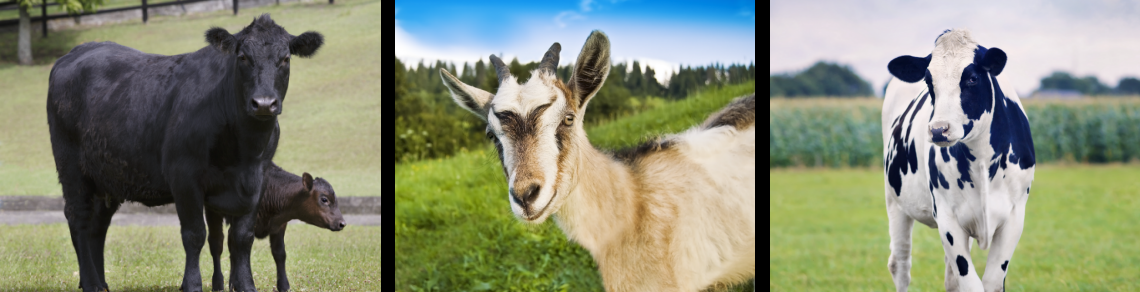
Heads (animals <100 kg)
- For small animals and wildlife, submit the entire head to the rabies lab for testing.
- Removal of the head is relatively easy and carries minimal risk of exposure to neural tissue and cerebral spinal fluid (CSF).
- Do not remove any skin, ears or the snout from the head, but if the animal has large horns that will make it difficult to package, these can be removed (this is most easily done while the head is still attached to the body).
- If the animal is infested with ticks or fleas, spray the head with insecticide before packaging. Also note the presence of any quills or sharp bone fragments on the lab submission form.
Head removal technique
If possible (and assuming the animal is not frozen), place the body in dorsal recumbency and extend the neck by pushing the top of the nose toward the ground, or bend the neck back over edge of table. Locate the larynx. Using a sharp knife, make an incision through the skin immediately behind the larynx, and continue cutting down through all of the soft tissues of the neck to the vertebral column. At this point a strong pair of pruning shears or similar instrument can be used to cut through the vertebral column of very small animals, and in very young animals (e.g. kittens, puppies) it may even be possible to separate the column with the knife alone. Alternatively, the vertebral ligaments can be torn by forcefully twisting the head 180-360 degrees. In larger cats and dogs, it is best to disarticulate the neck by cutting the ligaments on each side of the vertebral column. This is typically done at the first cervical vertebra (atlanto-occipital joint), but it can be done anywhere along the cranial cervical spine. Move the head up and down to identify the most obvious mobile joint in the neck, and angle the knife to cut down into the joint space on each side. Cutting the ligaments will immediately and substantially increase the mobility of the head. Once through the vertebral column, cut through the remaining skin and soft tissues to completely detach the head from the body.
Removal of the head from a frozen animal can be more challenging depending on the animal’s size and the position in which it was frozen. In some cases it may be necessary to partly thaw the body enough to extend the neck for head removal, but it is not necessary (nor recommended) to wait for the entire body to thaw. In very small animals it may still be possible to cut the tissues with a heavy knife, as described above, but for larger specimens a hatchet and mallet or saw (see below) will likely be necessary. If the head and neck are tightly curled around (typically the most difficult position for head removal), identify the back if the skull and begin cutting there. Cut the hide using a knife first, and if possible, create a shallow crevice in the underlying tissue in order to seat the hatchet or saw. Cut or saw down through the vertebral column, and then continue through the rest of the soft tissues of the neck. The saw or mallet will work best on hard/totally frozen tissue; tissue that has partially thawed and is softer is more easily cut with a sharp knife.
Video demonstrating head removal on a fresh carcass: https://youtu.be/YaNWISceyCc
Video demonstrating head removal on a frozen carcass: https://youtu.be/C8W9Qytpk3Y
Diagram and short instructions for head removal from a small animal (link)
Brains (animals >100 kg)
- Avoid removing the head from the animal’s body prior to removing the brain, as the neck and body will help stabilize the head during the procedure.
- Removing the brain in several large pieces is fine, as long as the anatomical structure of each portion is not destroyed (e.g. crushed or mashed).
- The cerebrum is often the most easily accessible portion of the brain, but the brain stem and spinal cord are the most desirable portions for testing.
Brain removal technique
1. Hatchet & mallet: This technique uses the hatchet as a chisel, struck repeatedly with the mallet, to remove the animal’s skull cap in order to access the brain underneath. The recommended tools are a minimum 1 lb sharp hatchet and a 2.5 lbs metal mallet. The weight of the mallet is particularly important, as it needs to be heavy enough to provide the needed power to the strikes, but not so heavy as to exhaust the operator.
This technique is most easily performed with the animal (or at least the head) in sternal recumbency. Skin the top of the head starting behind the poll and then rostral to the level of the eyes. It is easiest to cut the hide by puncturing it with the end of the knife, sliding the blade under the hide and cutting up through the underside (this will also help keep the knife sharp). Once the forehead is exposed, create four cuts with the hatchet and mallet: just caudal to the poll, across the forehead on a plane just caudal the lateral canthus of both eyes, and a lateral cut on each side joining the two. Angle the cuts slightly inward from perpendicular (~20 degrees) to facilitate removal of the skull cap, which is generally 1-2 inches thick in this area. Avoid cutting through the poll, but the rostral cut may be slightly shorter than the caudal cut, resulting in a rhomboid portion of the skull cap being removed. After the cuts are complete, if the skull cap is not readily released, ensure that all the cuts are sufficiently deep and intersect fully (the remaining attachments are often at the corners). The hatchet can also be used to help pry off the skull cap. Once removed, use scissors or a knife to carefully tear or cut through the dura overlying the brain, between the left and right cerebral hemispheres, and between the cerebrum and cerebellum. Use caution when removing the brain itself as there are often sharp bone ends from the hatchet cuts; a medium-to-large size spoon can help facilitate this. Be sure to remove the entire brain, including the brainstem, cerebellum and cranial spinal cord if possible.
Video demonstrating hatchet and mallet technique for brain removal in a cow: https://youtu.be/9ZR0pER8TdY
Diagram of placement of hatchet cuts for brain removal from a cow or horse (link)
2. Manual saw: The recommended tool is a long (e.g. 22”) solid-face cross-cutting (i.e. off-set teeth) wood saw. If the head of the animal has already been removed from the body, this technique may be safer to use if an assistant is needed to stabilize the head for sampling; however, an assistant should only be used as a last resort if there is no other way to stabilize the head. It may also be a preferable technique for animals lying in lateral recumbency that cannot be easily rolled into sternal.
The saw is used to make a single transverse cut directly through the middle of the brain case, angled just behind the ramus of the mandible, and the brain is removed in two pieces. This is most easily done with the animal in lateral recumbency. A (disposable) block of wood or similar object may be placed underneath the skull to elevate it slightly and aid with distraction of the two parts of the skull as the cut is made. First a sharp knife should be used to incise the hide along the entire path of the cut (dorsal, ventral and the upward-facing lateral side). If necessary, skin the hide back slightly so it does not interfere with the saw. Using the knife, cut through as much of the soft tissues in the throat area as possible so that the saw is only being used to cut through hard bone. Then place the saw on the lateral side of the skull (rostral to the poll and roughly perpendicular to the forehead) and begin the cut. Try to use long, even strokes as much as possible as this will be the most efficient. It may be necessary to pause periodically to clean the teeth of the saw, which is best done with a stiff brush or other item so as to avoid accidental cuts to the hand. The cut needs to be made almost entirely through the skull before the two pieces of the skull will separate significantly. If done correctly, part of the brain will then be visible in each part of the skull. Using a flat, blunt implement such as a scalpel handle, separate the brain from the surrounding dura (this should be quite easy) and then gently scoop the brain out of the brain case. The caudal portion of the brain may require some additional manipulation in order to coax out the cerebellum, and an attempt should be made to retrieve the cranial-most portion of the spinal cord as well, if accessible. Remember that removing the brain in several large pieces is fine, as long as the anatomical structure of each portion is not destroyed (e.g. crushed or mashed).
Video demonstrating manual saw technique for brain removal in a horse: https://youtu.be/r-Mz6XNIszk
Diagram of placement of saw cut for brain removal from a cow or horse (link)
3. Techniques to avoid: Electric power tools such as reciprocating hand saws are not recommended for removing the brain from rabies suspects due to the high potential for aerosolization of neural tissue and other infectious materials, which may come in contact with the operator, nearby animals or people, or contaminate the environment. Although there is some aerosolization risk with any technique, the risk is higher with electrical tools of this kind. Direct use of a hatchet or axe to remove the skull cap is also not recommended, due to the risk of trauma to the operator or assistant (if any) from misplaced strikes or strikes that may glance off the skull, as well as the substantial skill and experience needed to place strikes accurately.
Disposal of the body
- Once sampling is complete, the owner of the animal or the property on which it was found is responsible for disposal of the remaining tissues.
- Carcasses from small wildlife can be sent to landfill.
- Small animal crematoriums will generally not accept wildlife.
- In rural areas where municipal bylaws permit, the body can be buried on the property immediately if desired (particularly for livestock), but the tissues cannot be collected by a deadstock operator or sent to rendering until test results have confirmed that the animal is negative for rabies.
- Under no circumstances will tissues will be returned from the lab to the owner or any other party, but cattle over 18 months of age that are tested for rabies will generally also be tested by the CFIA for bovine spongiform encephalopathy (BSE).
Cleaning equipment and environment after sampling
- Rabies virus is very labile and is highly susceptible to routine disinfectants such as household bleach or common quaternary ammonium compounds (QAC).
- Remove as much organic material as possible from instruments using disposable paper towel, and then submerge the instruments in disinfectant solution (always follow label directions for dilution and contact time).
- Used disinfectant solution does not pose a significant risk, but should nonetheless be disposed directly down a drain.
- Place any paper towel or newspaper used to clean or protect surfaces during sampling with the rest of the body (i.e. in the body bag) for disposal once rabies test results are available. Otherwise, these items should be bagged appropriately and disposed as biological/biohazardous waste.
- Spray any potentially contaminated surfaces in the sampling environment with disinfectant solution, allow the appropriate amount of contact time (5-10 minutes for most common disinfectants) and then wipe or rinse off.
Shipping samples cold vs frozen
- Freezing samples does not affect testing, and is one of the best ways to preserve tissues if shipping will be delayed for more than a day, or if shipping must occur during hot weather.
- Samples that arrive at the rabies lab still frozen must be allowed to thaw before they can be tested which can cause delays, particularly with large samples such as large dog heads.
- If possible, the sample should be cooled/refrigerated prior to shipping and packed with additional cold packs and insulating absorbent material.
- Be sure to consider current weather conditions and whether or not the sample will likely spend more than a day in transit when deciding on the number of cold packs to use.
- Allowing a frozen sample to thaw and then freezing and thawing it again multiple times is very damaging to the tissues, as is allowing a sample to thaw completely and then heat up. These may interfere with testing.