


HECHMET How To
HECHMET at University of Guelph
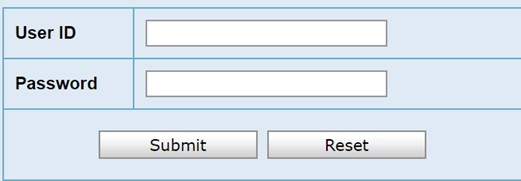
Log in: Vertére Chemical Inventory Login. ***Access to this site requires FULL TUNNEL VPN.
Sign up: Please follow directions as listed on this page.
HECHMET Getting Started: Accessing the Database
Once you have received your login and password from EHS,
-
Each Faculty or Manager at Research Stations has to set up 2 accounts:
- 1ST ACCOUNT: Inventory Manager - has the right to search, add chemicals, transfer within the lab locations, dispose of chemicals, and update inventory. The Faculty or Manager is an inventory manager. Inventory manager can ONLY see their lab inventory
- Inventory manager Hechmet access: USERNAME: IS THE SAME AS THE U OF G USERNAME. For example, if the U of G username is psmits@uoguelph.ca, the hechmet inventory manager username is also “psmits”
- PASSWORD: As provided to you (This is to be changed after the first login)
- 2ND ACCOUNT: Lab User or staff at research station – has the right to VIEW ONLY chemicals within the department. It is a View Only account and can be shared with your students to search chemicals or access SDSs etc. Lab User/staff can see the entire department inventory
- Lab user/staff Hechmet access: USERNAME ID: FACULTY LAST NAME LAB USER. For example, faculty last name is Smith. The faculty lab user/staff login would be: Smith lab user
- PASSWORD: As provided to you (This is to be changed after the first login)
- 1ST ACCOUNT: Inventory Manager - has the right to search, add chemicals, transfer within the lab locations, dispose of chemicals, and update inventory. The Faculty or Manager is an inventory manager. Inventory manager can ONLY see their lab inventory
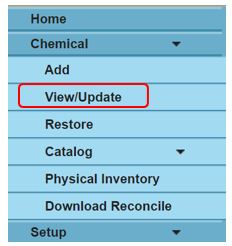
- There is only one module right now "Chemical". Click on "Chemical".
- From the left-hand menu, click on View/Update under the “Chemical” heading to view your chemical inventory. Faculty/Manager will have 2 accesses to Hechmet. Faculty/Manager, is an inventory manager and can search, add, transfer, delete chemicals for the PI specific inventory. Lab user/staff is a fake login and allows to view only all chemicals in the department.
Searching the Inventory
1. Log into Hechmet using your provided Username and Password.
***Access to this site requires users to be logged into FULL TUNNEL VPN
2. Click on the Chemical Module found on the right side of the screen.
3. Under the Chemical Heading on the left, click on View/Update.
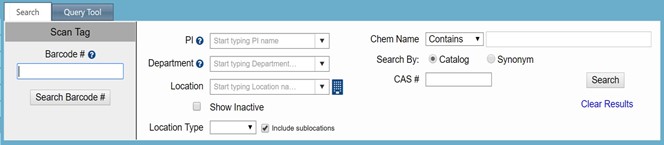
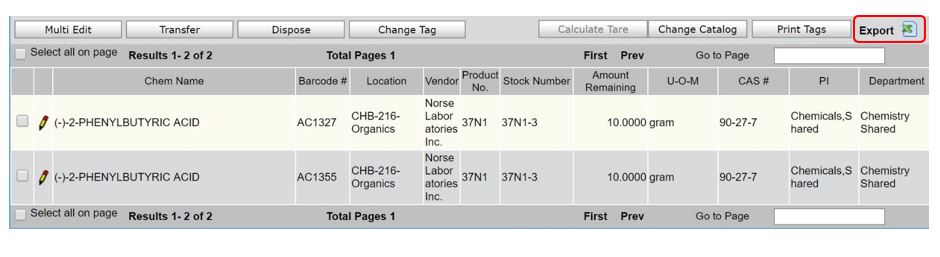
4. Use any of the filters to search by: (Bar Code #, PI, Department, Location, Chemical Name, CAS Number).
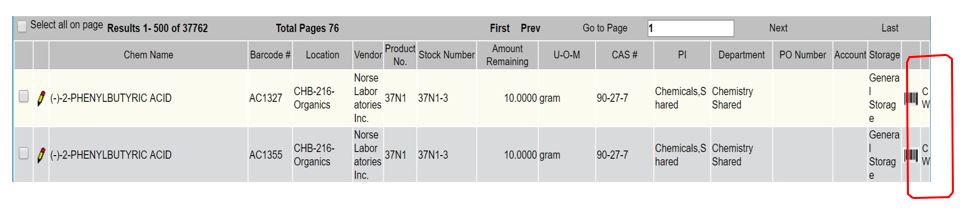
Note: Clicking on Column Headings will organize the list based on that quality. List can be exported to Excel.
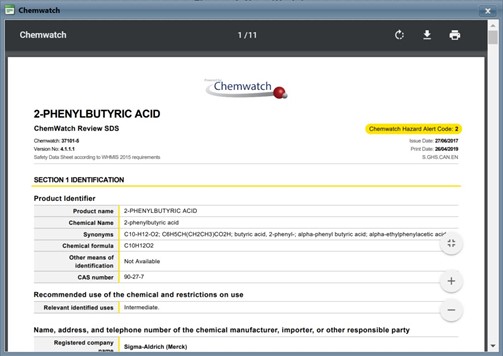
5. The SDS for a chemical can be accessed through EHS portal here: 3E SDS portal (UG login required).
Example – Searching by Chemical Name: Type in the chemical name and click Search. The results will appear in a list below the search box. This list can be filtered by adding more search criteria.
Note: Searching by CAS number locates the specific chemical regardless of differences in nomenclature.

6. The generated list can be exported to Excel by clicking the Export Icon. This will create an Excel spreadsheet containing all the chemicals listed under the Search Box.
Note: To export the entire lab inventory, search by researcher name in the Faculty or Manager text box or by room number in the Location text box. Then click Export.
Adding Chemicals to the Inventory
Select ADD option in the menu

STEP 1:
OPTION 1 - ENTERING THE CHEMICAL LISTED IN THE CATALOG

First, try to search the product by the PRODUCT NUMBER or STOCK NUMBER, click SEARCH
- to search by product number skip the volume part of the product ei. A841
- to search by stock number use all product number and volume ei, A841/4 – 4 stands for 4 L
If it does not work, you can try a combination of the available fields:
- CAS number and the VENDOR click SEARCH
- If CAS number is not on the bottle search by CHEMICAL NAME and VENDOR click SEARCH
- If the above doesn’t work search by MANUFACTURER and CHEMICAL NAME, click SEARCH
OPTION 2 - ENTERING THE CHEMICAL THAT IS NOT IN THE CATALOG
- If the chemical is not in the catalog click on CATALOG and select CREATE NEW.
- Enter the following information in the fields marks with asterisk, CHEMICAL NAME, AMOUNT, *U-O-M ( THAT INDICATES VOLUME), PRODUCT NUMBER (on the chemical bottle) and VENDOR then click SAVE
- Next click ADD
- Find the chemical that you just entered (by typing the CAS# or Chemical Name or Product Number)
STEP 2:
BARCODING USING PREPRINTED BARCODES
- If you find the right product, click on the GREEN check mark

- Enter the barcode number

Example of a Pre-Printed Barcode:

Using pre-printed barcodes (from EHS main office, Alexander Hall room 162) (type the barcode # in the blank window) First - Enter the LOCATION. The PI and Department will automatically auto populate (MOST OF THE TIMES). (Hechmet has a glitch in the system which we can use to our advantage. In location type PI name and location will show up instead of the PI last name. That way you don’t have to scroll down from the drop-down menu and search for building, floor, room etc.)
- Click on SAVE
- If using printer click on PRINT TAG
- Attach tag on the bottle
If you made a mistake and did not enter the right barcode number:
- Go to view/update
- Enter the barcode number you wish to change
- Select the product
- Click on change tag
- Enter the new barcode number
- Click on OK
To add an additional entry of the same chemical
- click COPY LAST DATA.
- Enter a new barcode # and click Save or click Print Tag to print the barcode (if applicable)

To add multiple entries of the same chemical
- click ADD MANY
- Type in the number of additional entries (YOU HAVE 5 IDENTICAL BOTTLES OF CHEMICALS. YOU ALREADY ENTERED 1, THEREFORE IN THE ADDITIONAL ENTRIES TYPE 4 TO MAKE IT UP TO THE TOTAL 5.
- If using pre-printed tags, click “Show” and manually type or scan the barcodes: then click Ok.
- If you are not using pre-printed tags, click Print Tags: then click Ok

Please see Barcoding Guide for more information
Transferring your Chemicals
*Only available to the Inventory Manager (most people have View Only access)
- Click on VIEW/UPDATE

Locate the chemical using:
A. PI. Choose Faculty/Manager last name follow by Lab
B. Enter the name of chemical
C. If needed, use other field names

Select the Checkbox next to the chemical(s) and then click on TRANSFER, If moving entire inventory click on SELECT ALL ON PAGE and click TRANSFER

When the new windows open

Type in new Location for either the same Faculty/Manager or chose a new Faculty/Manager
Click COMPLETE TRANSFER
NOTE: Multiple chemicals can be transferred at a time by selecting many chemicals at the same time.
To Remove Chemicals from the Inventory
NOTE: COMPRESSED GASSES INVENTORY IS STANDING. Therefore, do not remove barcodes from the Compressed Gas sheet (if applicable). If inventory is to be downsized, remove applicable barcodes, and apply on this sheet. Alternatively, Inventory Manager can dispose of the barcode within the system.
- Remove the bar code
- Fixed the barcode into the Barcode Disposal Form
- Mail the form to EHS, Alexander Hall room 162 via interdepartmental mail. Please do not email, scan or fax this sheet because the barcodes become distorted. The barcodes will be removed from your chemical inventory system by EHS. If you want to delete the chemical yourself, do the following:
- Click “View/Update”
- Type barcode in the barcode field
- Select the correct chemical
- Click “Delete”
- Disposed of the empty bottle appropriately
Changing the Barcode Number (if entered incorrectly)
- View/Update (instructions above).
- Choose the chemical by clicking the box to the left.
- Click on "Change Tag".
- Enter in correct tag number and save.
Dispose of Used Chemicals in your Inventory
- Go to view/update
- Manually enter the barcode number you wish to dispose of your inventory
- Select it to the left hand site
- Click on dispose
- Choose the PI that approved the disposal
- Select OK